
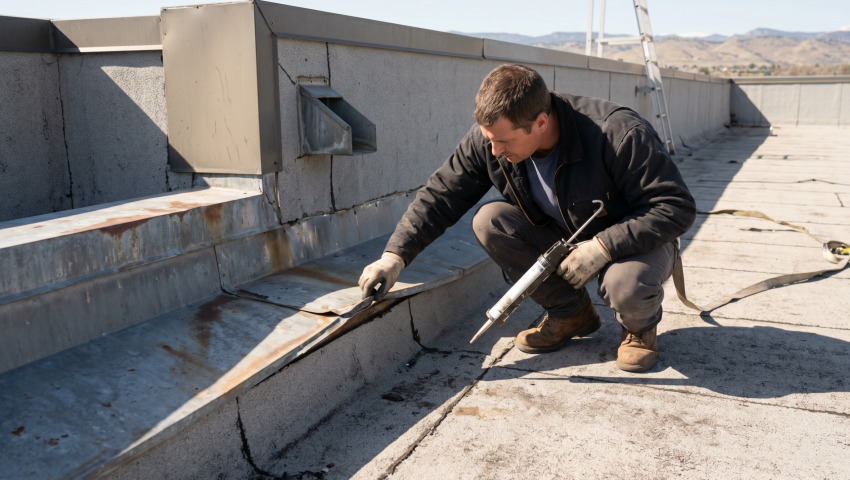
Most contractors seal flashing without checking for thermal movement, which leads to hidden leaks. Spotting expansion gaps early saves costly repairs later.
Many building owners assume a quick seal fixes any roof flashing issue, but Denver’s freeze‑thaw cycles and hail often expose hidden gaps that a simple seal won’t stop. The reality is that overlooking proper metal expansion joints can let water seep in during spring melt, creating hidden damage that spreads quickly. In practice, the most overlooked part is confirming that flashing overlaps follow a true shingle fashion, not just a flat lap, especially on parapet walls and scupper boxes.
This guide looks at commercial roof flashing repair through the lens of Denver’s climate, focusing on steps that keep the system watertight through snow, wind, and UV exposure. After reading, you’ll recognize the exact points where water can infiltrate and how to fix them with proven methods that meet IBC and SMACNA standards. You’ll also see how to document the work for warranty continuity and city code compliance.
Step 1: Inspect and Document Existing Flashing
You’ve probably walked the roof after a storm and seen rust spots, but many miss the subtle lift at the edge of a termination bar that lets water pool. The first phase is a thorough visual and moisture mapping to locate every compromised seam, especially around parapet walls in Littleton and Castle Pines where wind uplift is strongest. This step eliminates the guesswork that leads to patch‑and‑pray fixes that fail under Denver’s hail.
Watch for loose fasteners, cracked sealant, and any sign of metal buckling; these are the red flags that most crews overlook. A successful inspection ends with a clear map of problem areas, photos for the report, and a list of components that need replacement or reinforcement.
Inspection Checklist
- Photos: Capture each joint, edge metal, and scupper before work begins; this visual record speeds warranty claims and code verification.
- Fastener Check: Verify that all screws or rivets are seated and not pulled out by wind uplift; replace any corroded fasteners with stainless steel to avoid galvanic corrosion.
- Sealant Condition: Look for cracked polyurethane or silicone sealant, especially around base flashing; replace with a high‑performance sealant meeting EPA Safer Choice guidelines.
- Thermal Gaps: Use a infrared thermometer to spot temperature differentials that indicate hidden gaps; these often appear after hail impact on metal flashing.
By the end of this inspection you’ll have a precise map of every leak path and a clear inventory of parts to order. This foundation lets the next phase focus on preparing a clean, dry surface, which is essential for a lasting repair. With the problem spots identified, you can move confidently to the removal and cleaning stage.
Step 2: Remove Damaged Flashing and Clean the Substrate
The next phase is to strip away the compromised flashing and any loose sealant, exposing the roof deck for a solid bond. In Denver, hail often dents metal flashing, so you’ll need to pry off deformed sections without damaging the underlying membrane. A clean, dry substrate ensures the new flashing adheres properly and prevents future water intrusion.
If you leave old mastic or rust residue, the new sealant will not adhere, leading to premature failure. Confirm that the deck is dry by checking moisture readings; a reading below 5 percent indicates a safe surface. Once the area is clean, you can proceed to fabricating and installing the replacement flashing.
Step 3: Fabricate and Install New Flashing
Many installers cut flashing to size on site and then discover the piece doesn’t fit the irregular edge of a parapet wall. The key is to pre‑fabricate metal pieces using the exact dimensions from the inspection map, then test fit before fastening. This avoids the common mistake of forcing a piece into place, which can cause buckling under wind uplift.
Pay special attention to expansion joints; Denver’s temperature swings demand a small gap or a flexible sealant to accommodate movement. Secure fasteners at the recommended spacing, typically every 12 inches for 24‑gauge steel, to meet SMACNA wind uplift requirements. A properly sealed seam will pass a controlled water test without leaks.
Installation Details
- Material Choice: Use galvanized steel for cost‑effective durability or stainless steel where corrosion risk is high; both meet ASTM D6380 specifications.
- Overlap Technique: Install flashing in a shingle fashion with at least 2 inches of overlap on each course; seal the upper edge with a high‑performance polyurethane sealant.
- Fastener Spacing: Place stainless steel screws every 12 inches along the top edge and every 18 inches on the side flanges to satisfy IBC wind uplift criteria.
After installing the new flashing, you’ll have a watertight barrier that can handle Denver’s hail and wind loads. The next step is to seal all joints and perform a final water test to verify the repair’s integrity. This ensures the building envelope remains protected throughout the harsh Colorado seasons.
Step 4: Seal, Test, and Document the Repair
A frequent error is to skip the final water test, assuming the sealant will hold under rain. In reality, a controlled test reveals hidden gaps that could become leaks during a spring melt. This phase applies a UV‑stable silicone sealant, runs a water spray test, and records the results for warranty and code compliance.
Make sure the sealant is compatible with the flashing material; EPA Safer Choice‑approved products reduce chemical exposure for workers. Once the test shows no drainage, you can finish the job with a clean‑up and a detailed report that includes photos, material specs, and compliance with the International Building Code.
Final Checklist
- Sealant Application: Apply a continuous bead of silicone sealant along all seams, ensuring a smooth finish that resists UV degradation.
- Water Test: Use a garden hose to simulate rainfall for 15 minutes, watching for any drips at joints or terminations; adjust sealant as needed.
- Documentation: Compile photos, material data sheets, and a signed inspection report; this documentation supports warranty claims and Denver building permits.
- Safety Review: Verify that fall protection and scaffolding meet OSHA 29 CFR 1926 Subpart M and L standards before final cleanup.
- Maintenance Plan: Schedule a semi‑annual visual check, especially after hail season, to catch early signs of wear.
With the sealant cured and the water test passed, the roof flashing system is ready to protect the building for years to come. This comprehensive approach eliminates the hidden leaks that plague many commercial roofs in Denver and its surrounding towns. If any future issues arise, you’ll have the documentation and maintenance schedule to address them quickly.
Putting the Repair Process Into Practice
You’ve now walked through a full cycle from inspection to final testing, turning a leaky roof into a reliable barrier against Denver’s snow, hail, and wind. Each step was designed to meet industry standards while addressing the unique climate challenges of Colorado’s high‑altitude cities. The result is a flashing system that meets IBC and SMACNA requirements and stands up to the toughest weather events.
For ongoing protection, schedule regular roof inspections and keep a maintenance log, especially after severe storms. When you need a professional touch, our commercial roof repair team can verify the work and provide a seamless restoration service. Feel confident that your building’s envelope is secure and ready for the next season.
Author
JJ Hedden is the owner of Peak To Peak Roofing and brings fifteen years of commercial roofing experience to every repair guide. He has overseen thousands of roof flashing projects across Denver, Aurora, and the surrounding metro area, ensuring each job meets strict code and performance standards. His hands‑on perspective helps building owners understand the practical steps needed for lasting roof protection.