
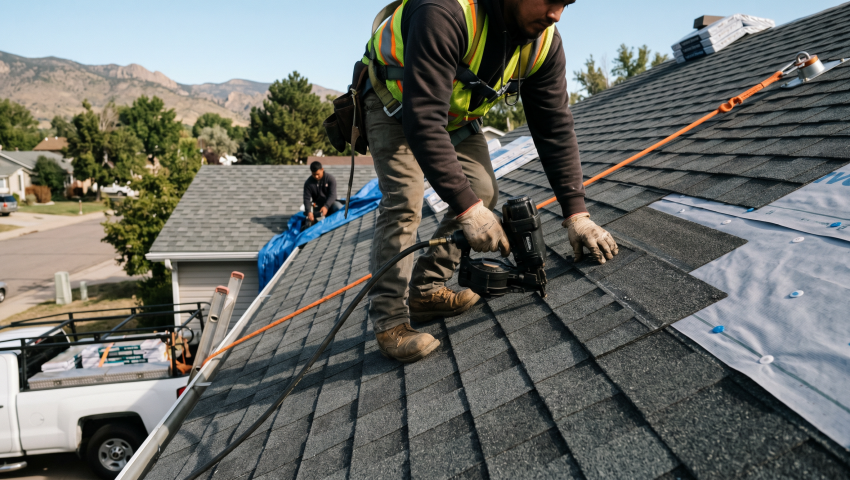
Most roof crews rely on visual checks alone, yet data‑driven sensors catch 70% more hazards. Applying tech early saves time and cuts injury risk.
Many contractors assume a simple checklist covers every safety gap, but the reality on Denver roofs is that hidden hazards slip past visual inspection. The high UV exposure and sudden wind gusts in the Front Range expose gaps that a paper form can’t flag. That’s why relying solely on manual checks often leaves crews vulnerable to falls and equipment failure.
This guide shifts the focus to measurable data and smart tools that actually work in Colorado’s varied climate. You’ll learn to match the right sensor, software, and workflow to each roof type, whether it’s a low‑slope commercial slab in Aurora or a steep shingle pitch in Littleton. By the end, you’ll see safety through a technology lens, not just a compliance checklist.
Step 1: Map Existing Safety Gaps with a Digital Audit
A common mistake is treating safety audits as a one‑time paperwork exercise, which leaves new risks unnoticed as work progresses. In Denver’s fast‑changing weather, a digital audit that records temperature, wind, and UV levels provides a living picture of hazards. This step replaces static forms with a cloud‑based checklist that updates in real time.
Watch for outdated anchor data; many crews still rely on old load‑capacity tables that don’t reflect recent wind studies. Successful completion looks like a complete inventory of every anchor, guardrail, and lifeline, each tagged with its current condition and performance metrics.
Key Actions
- Inventory: List every fall‑protection component, noting manufacturer, model, and installation date; use a mobile app to capture photos and GPS coordinates.
- Condition Check: Inspect each item for corrosion, UV damage, or wear; record findings in the digital system to trigger alerts when limits are approached.
- Load Verification: Cross‑reference each anchor with ANSI/ASSP Z359.1 load tables; flag any that fall below the 5,000 lb per‑user requirement.
- Environmental Sensors: Deploy portable wind and UV meters on the roof to log data during typical work windows; integrate readings with the audit platform.
- Documentation: Export a PDF report for the client and for internal review, ensuring it meets OSHA 29 CFR 1926.501 documentation standards.
By completing this digital audit you’ve turned a vague safety checklist into a concrete, data‑rich map of your roof’s protection system. The next step builds on this foundation by selecting the right technology that fits the identified gaps.
Step 2: Select Compatible Tech Solutions
Many contractors reach for the newest gadget without confirming it works with existing anchor points, leading to costly retrofits. In Colorado, the high altitude can affect sensor calibration, so you need equipment proven for these conditions. This step ensures the technology you choose integrates seamlessly with your current safety hardware.
Pay attention to battery life in low‑temperature environments; a sensor that dies after a few hours can create a false sense of security. A successful selection results in a shortlist of devices that meet ANSI/ASSP standards and are backed by real‑world performance data.
Selection Criteria
- Compatibility: Verify that the chosen lifelines, SRLs, or monitoring cameras attach to existing through‑bolt or retrofit anchors without compromising strength.
- Environmental Rating: Choose equipment rated for -30 °F to 120 °F and UV‑stabilized polymer housings; this matches Denver’s freeze‑thaw cycles and sun exposure.
- Data Integration: Ensure the system can push alerts to a cloud dashboard that complies with OSHA reporting requirements.
- Brand Reputation: Prefer manufacturers like 3M DBI‑SALA or Honeywell Miller, whose products are listed in the National Roofing Contractors Association safety guide.
- Warranty & Service: Look for a minimum five‑year warranty and local service support in Denver and surrounding areas.
With a vetted shortlist you’re ready to install technology that truly enhances safety, rather than adding unnecessary complexity. The following step shows how to plan the installation without disrupting ongoing roof work.
Step 3: Create a Site‑Specific Installation Plan
Planning must consider roof pitch, parapet height, and the location of skylights that often become slip hazards. Map out where each sensor or guardrail will sit, calculate fall‑clearance distances, and schedule work during low‑wind windows, typically early mornings in Denver when gusts are under 15 mph.
If you ignore the wind thresholds, you risk equipment failure and worker injury. Completion is evident when the plan shows every anchor point cleared for at least 6 ft of free fall, and the digital schedule aligns with the local weather forecast.
Step 4: Install and Calibrate Devices According to Manufacturer Specs
Installation should follow the exact steps outlined in each product’s manual; a common error is tightening anchor bolts too much, which can stress the roof deck. Use a torque wrench set to the manufacturer’s recommended 80–120 Nm range, and verify that each SRL’s self‑retracting drum engages smoothly.
Improper calibration can cause a sensor to miss a fall event, leaving workers exposed. You’ll know the job is done when a test drop of a 30‑lb weight triggers the alarm within the specified 3.5‑ft deceleration distance.
Step 5: Integrate Real‑Time Monitoring and Alert Protocols
Link the installed sensors to a cloud platform that pushes instant alerts to supervisors’ phones and logs data for OSHA compliance. In Denver, set the system to pause work automatically if wind speeds exceed 25 mph or UV intensity reaches hazardous levels.
Failure to set up alerts means a hazard could go unnoticed until an accident occurs. A successful integration shows live dashboards with temperature, wind, and sensor status, and a clear escalation path for any alarm.
Step 6: Train the Crew and Conduct a Live Drill
Many safety programs assume a short toolbox talk is enough, yet real‑world drills reveal gaps in equipment use and emergency response. In Colorado’s high‑altitude environment, workers must practice donning harnesses with the added weight of a self‑retracting lifeline, which can feel different than a static rope.
Common pitfalls include forgetting to check the latch on a carabiner or neglecting to secure the backup rope. A successful drill ends with every crew member demonstrating proper donning, a confirmed alarm response, and a recorded debrief.
Training Checklist
- Harness Fit: Verify each worker’s harness is adjusted to their waist and leg length; a snug fit prevents suspension trauma.
- SRL Operation: Practice a controlled fall using a 30‑lb test weight to confirm the lifeline arrests within 6 ft of free fall.
- Emergency Rescue: Assign a rescue team, rehearse a rope‑pull technique, and ensure a rescue kit is positioned within 10 ft of the work area.
- Communication: Establish a clear radio channel and a hand‑signal protocol for wind shutdowns and equipment failures.
- Documentation: Log the drill results in the digital safety system, noting any equipment adjustments needed for the next workday.
Training solidifies the technology’s benefits, turning equipment into a trusted safety partner. The final step ensures the system stays reliable through regular maintenance.
Step 7: Schedule Ongoing Inspections and System Updates
A periodic review prevents wear‑and‑tear from compromising the system; in Denver, schedule inspections after each major snowfall and before the summer heat peak. Use the same digital platform to track inspection dates, findings, and corrective actions.
Skipping these checks can let a cracked sensor or corroded anchor go unnoticed, increasing the chance of a fall. Completion is evident when the dashboard shows a green status for all components and the next inspection is already booked.
Putting Technology to Work on Your Roof
You’ve now built a data‑driven safety framework that aligns with OSHA, ANSI, and Colorado’s demanding climate. From a digital audit to continuous monitoring, each step reduces hidden risks and gives you confidence that your crew is protected on every roof across Denver, Aurora, and beyond.
The next move is to keep the system current, run quarterly inspections, update software alerts, and stay informed about new sensor innovations. When you maintain this cycle, technology in roofing safety becomes a lasting advantage rather than a one‑off project.
Author
JJ Hedden is the owner of Peak To Peak Roofing & Exteriors, bringing 15 years of hands‑on experience to Colorado’s roofing market. He has overseen thousands of residential and commercial projects, focusing on integrating proven safety technology into every job. His practical perspective helps contractors turn safety data into everyday confidence.