
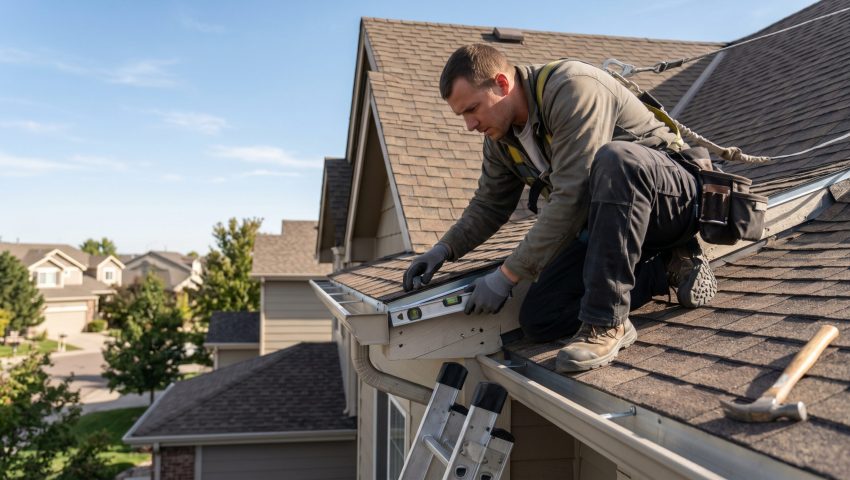
Most homeowners think bigger gutters solve ponding, yet proper slope and sizing matter more. Adjusting those details can cut overflow risk dramatically.
Many property owners assume that adding a larger gutter will stop water from pooling on their roof, but the real issue often lies in the slope and connection details. In Denver’s mix of summer thunderstorms and winter snow, an undersized or poorly sloped system can flood eaves despite oversized components. The common shortcut of “just bigger” ignores the engineering standards that dictate flow rates and wind resistance. You’ll see why that mindset leads to recurring leaks and costly repairs.
This guide flips the script by focusing on the exact calculations and installation tweaks that actually move water off the roof efficiently. You’ll learn how to size gutters based on ASCE 7 rain loads, set the correct 1/16‑inch‑per‑foot slope, and choose materials that survive hail and UV exposure in the Front Range. By the end, you’ll feel confident that your roof drainage works as intended, no matter the season.
Step 1: Assess Existing Drainage Performance
Start by walking the roof perimeter and noting any standing water, ice dams, or overflow during the last rain event. In Denver, a 5‑minute storm can dump more than 4 inches per hour, so watch for ponding that exceeds a quarter‑inch depth. Use a level to verify that gutters slope at least 1/16 inch per foot toward downspouts, and check that downspout outlets are clear of debris. This step uncovers hidden bottlenecks that simple visual checks often miss.
If you miss a subtle slope error, water will linger and eventually seep behind the fascia, leading to rot. A quick test is to pour a bucket of water at the highest gutter point and watch its path; it should flow freely to the downspout within seconds. When the water disappears without pooling, you know the slope is adequate and you can move on to sizing calculations.
Step 2: Calculate Required Gutter Capacity
Skipping this step often leads to undersized downspouts that overflow during summer thunderstorms. Verify your calculations by checking that the chosen downspout size, such as a 3‑inch round, can convey the required gallons per minute without backing up. When the numbers line up, you’ll have a system that meets ASCE 7 load criteria and avoids costly retrofits later.
Step 3: Select Materials and Install Secure Fasteners
A common misconception is that any gutter material will survive Denver’s hail and UV exposure, yet aluminum with a baked enamel finish and proper hangers offers the best balance of durability and cost. Choose 5‑inch aluminum gutters with a 0.032‑inch thickness, and pair them with stainless‑steel hidden hangers spaced every 2 feet to resist wind uplift per ANSI/SPRI ES‑1. The right fasteners keep the system from pulling away during a 120‑mph gust.
Watch out for using standard steel screws that can corrode quickly; instead, use stainless‑steel or coated fasteners that match the gutter material. A field note: in practice, the pattern you’ll see most often is a loose hanger at the roof edge, which creates sag and water backup. When all hangers are tight and the gutter sits flush against the fascia, you’ve achieved a solid, wind‑resistant installation.
Key Installation Details
- Materials: Choose 5‑inch aluminum gutters with a 0.032‑inch gauge and a baked enamel finish for UV resistance and hail durability.
- Fasteners: Use stainless‑steel hidden hangers every 2 feet and 3‑inch downspout straps every 5 feet, matching the gutter material to avoid galvanic corrosion.
- Sealants: Apply a silicone sealant at each joint and seam, ensuring a watertight connection that can handle freeze‑thaw expansion.
With the correct material and secure fasteners in place, the drainage path is now both structurally sound and resistant to Denver’s extreme weather. This foundation lets the system move water efficiently, setting the stage for any additional overflow controls you may add later.
Step 4: Integrate Overflow and Secondary Drainage
Even a perfectly sized gutter can be overwhelmed by a sudden 5‑minute deluge, so add an overflow weir or scupper that redirects excess flow to a secondary downspout or a rain garden. The IIBEC guide recommends a weir height no more than 2 inches above the gutter lip, allowing water to spill over before the gutter overfills. Position the overflow toward a low‑lying area away from foundations, complying with the Denver Stormwater Management Manual.
If the overflow is set too high, water will simply pool on the roof edge and cause ice dam formation in winter. Verify the weir by running a hose at the gutter’s highest point; water should spill over into the secondary pipe once the main gutter reaches capacity. When the overflow activates as intended, you’ve added a safety net that protects against extreme rain events.
Step 5: Finalize with Testing and Maintenance Plan
The final phase is a full system test followed by a maintenance schedule that keeps the drainage clear year‑round. Run water through each downspout using a garden hose, checking for leaks at seams and ensuring the flow reaches the ground without splashing onto the foundation. In Denver, schedule a visual inspection after the first heavy snow melt to catch any ice‑dam buildup early.
Neglecting regular cleaning can undo all the previous work, as debris quickly clogs gutters and reduces capacity. Set a quarterly cleaning reminder, and consider installing mesh guards that block leaves while allowing water through. When the system passes the flow test and you have a maintenance calendar, you’re ready to enjoy a dry roof and protected home.
Putting the System to Work
You’ve now moved from a leaky, undersized roof drainage setup to a robust, code‑compliant system that handles Denver’s intense summer storms and winter ice. By measuring slope, sizing components, choosing durable materials, adding overflow paths, and establishing a maintenance routine, you’ve dramatically lowered the risk of water damage to your foundation and interior.
The next step is to keep an eye on the system during seasonal changes and address any wear before it becomes a problem. If you need professional assistance with installation or repair, our team offers commercial roof restoration and seamless gutter services that follow the same proven standards.
Author
JJ Hedden is the owner of Peak To Peak Roofing, bringing 15 years of hands‑on experience to roof drainage projects across Denver and the Front Range. His work on commercial roof restoration and seamless gutter installations gives him a practical perspective on how to design systems that survive hail, snow, and UV exposure. He writes this guide to help homeowners and business owners avoid common pitfalls and achieve lasting protection.