
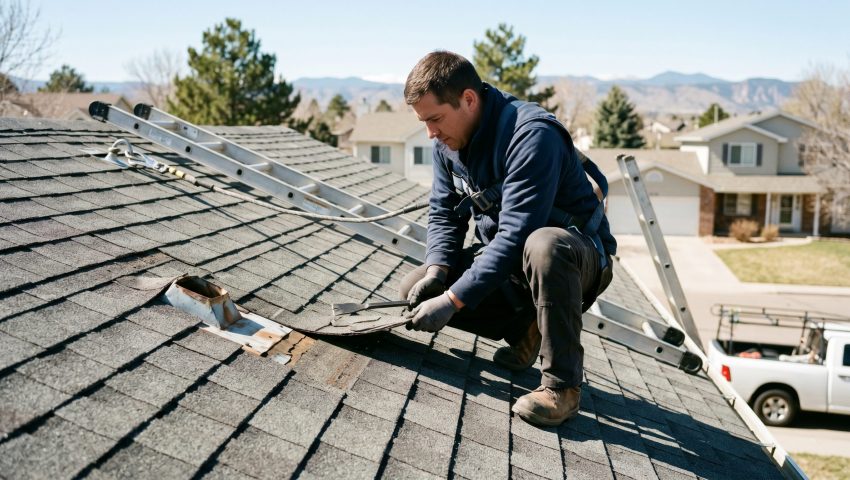
Most homeowners think a visual check is enough, yet hidden fastener gaps often cause leaks that void coverage. Spotting those gaps early saves money and keeps policies intact.
A lot of people assume that a quick glance from the ground will reveal any roof problems, but the reality in Denver’s hail‑prone climate is that damage often hides under shingles or around flashings. Ignoring those hidden issues leads to surprise claims when a storm finally hits. The common belief that “if it looks fine, it’s fine” actually increases the risk of a denied claim.
This guide flips that mindset by focusing on the hidden layers and the code‑driven details that insurers scrutinize. After reading, you’ll be able to spot the subtle signs that matter, apply proven hardening tactics, and document everything in a way that satisfies both the International Residential Code and your insurer’s expectations.
Step 1: Inspect Fastener Patterns and Flashing
You’ve probably walked the roof once a year and thought the job was done, yet many roof failures start with loose or missing fasteners that let wind uplift and water seepage. In Denver’s high‑wind events, a single loose nail can let a whole shingle peel away, creating a claim‑triggering leak. This step corrects that hidden weakness before the next storm arrives.
Watch for ring‑shank nails that are spaced too far apart, especially on architectural shingles that require six fasteners per shingle in high‑wind zones. Also check step flashing for cracked sealant or rusted metal that can let water travel behind the roof deck. When every fastener is secure and flashing is sealed, the roof meets the ICC‑ES AC48 acceptance criteria and reduces uplift risk.
Key Checks
- Fastener Count: Verify six nails per shingle on high‑wind sections, using a torque‑controlled drill to achieve the manufacturer‑specified pull‑out strength of at least 150 lbf per fastener.
- Nail Type: Use ring‑shank or screw‑shank nails made of corrosion‑resistant steel; avoid smooth‑shank nails that can back out under wind pressure.
- Flashing Seal: Apply a high‑quality sealant to step and counter flashing, ensuring a continuous barrier that meets UL 790 Class A fire rating.
- Inspection Tool: Employ a magnetic stud finder to locate hidden fasteners under the shingle surface, a trick that often reveals missed spots.
After tightening every fastener and resealing all flashing, the roof’s structural integrity aligns with ASCE 7‑16 wind load requirements. This solid foundation makes the next step, moisture control, much easier to evaluate. You’ll notice a clear reduction in potential uplift points, which insurers love to see.
Step 2: Apply Impact‑Rated Underlayment
Many homeowners think installing a basic felt underlayment is enough, but Denver’s hail frequency demands a tougher barrier. A standard felt can tear under a Class 4 hail event, exposing the deck to water infiltration and claim disputes. Upgrading to a synthetic underlayment with a Class 4 UL 2218 rating changes that outcome.
Make sure the underlayment overlaps by at least 6 inches on each course and is sealed with a compatible tape to prevent wind‑driven rain from sneaking under the shingles. The material must also meet the local amendment for ice and water shield at eaves and valleys, which helps stop ice dam formation during winter.
Installation Tips
- Product Choice: Use a synthetic underlayment rated for Class 4 impact resistance, such as a SBS‑modified membrane that tolerates hail speeds up to 120 mph.
- Overlap Method: Stagger seams by 6 inches and secure with ring‑shank nails placed every 12 inches to maintain wind uplift resistance.
- Sealant Application: Apply a self‑adhesive tape at all seams, ensuring a water‑tight seal that complies with ICC‑ES AC48.
- Edge Detail: Install a drip edge along the eaves before the underlayment to guide water away from the roof deck.
With a robust underlayment in place, the roof now has a secondary line of defense that satisfies both the National Roofing Contractors Association guidelines and insurer expectations for hail‑prone regions. The next phase will focus on ventilation, which works hand‑in‑hand with this barrier to prevent moisture buildup.
Step 3: Balance Attic Ventilation
You might believe that any vent will do, yet improper ventilation can trap heat and moisture, leading to premature shingle cracking and ice dam formation, both common claim triggers. In Denver’s wide temperature swings, a balanced NFVA ratio of 1:150 to 1:300 is essential for keeping the roof deck dry and the attic temperature stable.
Measure the total intake and exhaust vent areas, then adjust by adding soffit vents or ridge vents as needed. Remember that blocked vents, especially in winter, defeat the purpose and can cause condensation that see the deck and underlayment.
Here is a quick comparison of common ventilation options and their typical airflow contributions:
| Vent Type | Typical Opening | NFVA Ratio | Best Use |
|---|---|---|---|
| Soffit Vent | 2 in × 4 in per ft | 1:150 | Standard residential |
| Ridge Vent | 1 in × 12 in per ft | 1:150 | Steep‑slope roofs |
| Powered Attic Fan | Variable | 1:150‑1:300 | High‑heat climates |
| Gable Vents | 2 in × 2 in per ft | 1:200 | Supplemental intake |
Ventilation Balance
- Intake Area: Ensure soffit vents provide at least 1 sq ft of opening per 150 sq ft of attic floor, using a calibrated vent calculator for accuracy.
- Exhaust Area: Install ridge vents or powered attic fans to match the intake area, aiming for a 1:150 ratio to meet IRC R806 requirements.
- Clear Blockages: Check for insulation or debris that may cover vent openings, especially after a remodel or attic insulation upgrade.
- Verification: Use a handheld anemometer to confirm airflow direction during a windy day, ensuring air moves from soffit to ridge.
Achieving the correct ventilation ratio prevents moisture accumulation that can cause shingle delamination and ice dams, both of which insurers flag as preventable damage. With a dry attic, the roof system operates within the design parameters set by the International Residential Code. The next step will address the final protective layer, roof coatings and sealants.
Step 4: Upgrade to Impact‑Rated Shingles
Many homeowners stick with the cheapest 3‑tab shingles, assuming they’ll last long enough, but Denver’s hail and wind expose those thin layers to rapid failure. Switching to Class 4 UL 2218 shingles with a Class H wind rating dramatically reduces the chance of a hail‑induced claim.
Choose a product that also meets the local snow load requirement of 30 psf, and verify that the manufacturer’s warranty aligns with the roof’s design life. Proper installation includes sealing the starter course and using the correct fastener schedule to meet ASTM D7158 wind resistance standards.
Selection Criteria
- Impact Rating: Select shingles rated Class 4 for hail, providing resistance to impacts up to 2 in diameter ice pellets.
- Wind Rating: Ensure the shingles meet at least Class H (120 mph) wind resistance, as per ASTM D7158, for Denver’s occasional gusts over 60 mph.
- Warranty Alignment: Pick a brand offering a 30‑year limited warranty that covers hail damage, such as GAF Timberline HDZ.
- Installation Detail: Use a 6‑fastener pattern per shingle and verify that the underlayment is fully sealed before shingle placement.
By installing impact‑rated shingles, the roof now meets the performance thresholds that insurers look for when evaluating hail damage. This upgrade also aligns with the NRCA Roofing Manual recommendations for high‑risk regions. The next step will focus on sealing the roof’s perimeter to prevent water intrusion.
Step 5: Seal Perimeter and Penetrations
A common mistake is assuming that flashing around vents and chimneys will hold forever, yet thermal cycling in Denver causes sealant to crack, leading to leaks that trigger insurance claims. Properly sealing these critical points eliminates a major source of water damage.
Apply a high‑quality silicone or polyurethane sealant to all pipe boots, skylight curbs, and chimney flashings. Follow the manufacturer’s cure time and ensure the sealant is compatible with the roofing membrane to avoid premature failure.
Material comparison for perimeter sealing:
| Sealant Type | Temperature Range | UV Resistance | Typical Lifespan |
|---|---|---|---|
| Silicone | -40 °F to 200 °F | High | 15–20 years |
| Polyurethane | -20 °F to 180 °F | Medium | 10–15 years |
| Roofing Cement | 0 °F to 150 °F | Low | 8–12 years |
Sealant Checklist
- Pipe Boots: Replace aging boots with new ones rated for Class A fire resistance, then apply a silicone sealant that remains flexible in sub‑zero temperatures.
- Skylight Flashing: Use a metal flashing kit with a built‑in drip edge, sealing all seams with a UV‑stable tape.
- Chimney Cricket: Install a cricket to divert water away from the chimney base, then seal the transition with a compatible roofing cement.
- Gutter Integration: Ensure gutters are securely attached and have a ½‑inch slope toward downspouts to prevent overflow onto the roof edge.
With all penetrations sealed, the roof system becomes a continuous barrier against water intrusion, satisfying the ICC‑ES AC48 criteria for water resistance. This preparation sets the stage for the final documentation step that will make your insurance claim process smoother. Below is a concise overview of the sealing materials and their typical performance ratings:
Step 6: Document Inspection Findings for Insurance
The final practical step is to create a clear, date‑stamped documentation package that insurers can review without question. Capture high‑resolution photos of each repaired area, note the material specifications, and reference the relevant code sections such as IRC R905 for roof decking and ICC‑ES AC48 for assembly acceptance.
If any detail is missing, like a photo of a sealed chimney boot or a copy of the impact‑rated shingle warranty, the claim may be delayed or denied. A complete packet includes a written summary, a checklist of performed actions, and a copy of the professional roof inspection report from our team.
Step 7: Schedule Ongoing Maintenance and Review
You’ve probably assumed that a one‑time fix is enough, yet roofs are living systems that need regular attention, especially after the seasonal shifts in Denver’s climate. Without a maintenance schedule, small issues can grow into major claims that insurers view as preventable.
Set a bi‑annual inspection calendar, ideally in spring after hail season and in fall before snow accumulation. During each visit, repeat the fastener check, verify ventilation clearances, and look for any new water stains that indicate hidden leaks.
Maintenance Routine
- Bi‑annual Inspection: Perform a visual walk‑through and a professional roof inspection each spring and fall, documenting any changes with photos.
- Fastener Re‑check: Tighten any loose nails discovered during the inspection, focusing on high‑wind zones near eaves and ridges.
- Vent Clearance: Remove debris from soffit and ridge vents to maintain the NFVA ratio and prevent moisture buildup.
- Sealant Refresh: Re‑apply sealant to any cracked joints, especially after severe temperature swings that can cause shrinkage.
- Record Keeping: Store all inspection reports, photos, and material warranties in a cloud folder for easy access when filing a claim.
By establishing a disciplined maintenance rhythm, you keep the roof in peak condition and demonstrate to insurers that you’re actively managing risk. This proactive approach not only protects your home but also reinforces the credibility of your insurance documentation, making future claims smoother and more likely to be approved.
Putting Your Roof to Work
You now have a complete, code‑compliant roadmap that tackles everything from hidden fasteners to impact‑rated shingles and meticulous documentation. Each step reduces the chance of a claim denial by addressing the exact issues insurers flag as preventable damage. The result is a roof that stands up to Denver’s hail, wind, and snow while keeping your insurance premiums stable.
The next move is to schedule a professional roof inspection with our team and set up a maintenance calendar that aligns with the seasonal patterns of the Denver metro area. Consistent upkeep will keep your roof, and your insurance coverage, healthy for years to come.
Author
JJ Hedden is the owner of Peak To Peak Roofing and brings fifteen years of hands‑on experience protecting Denver homes from roof damage. He has helped thousands of homeowners navigate insurance requirements while implementing hail‑resistant roofing solutions. His practical, field‑tested approach ensures that every roof he works on meets both code standards and insurer expectations.