
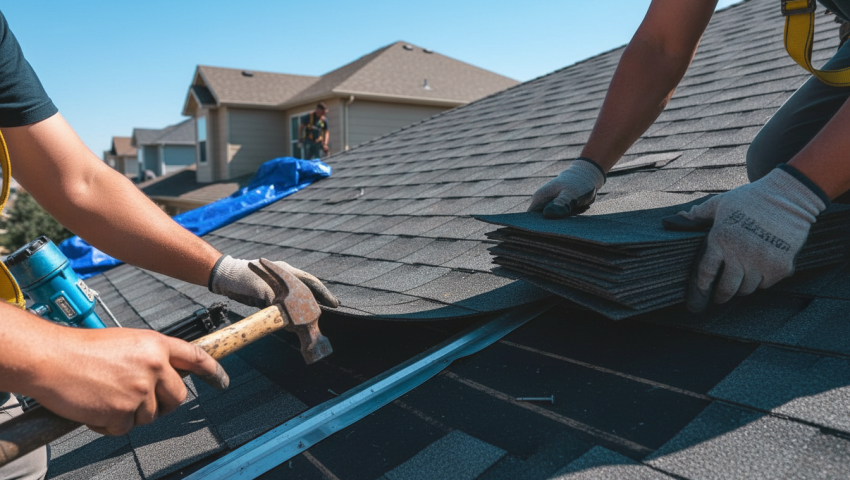
Roofing insurance claims can feel like a maze, especially after a hailstorm or wind event in Colorado’s Front Range. Many homeowners in Denver, Aurora, Littleton and Parker start the process without a clear plan and end up with delayed payouts. Understanding the technical standards, local codes and insurer expectations can turn a frustrating experience into a smooth resolution.
Follow these seven actionable steps to document damage, meet code requirements and negotiate a fair roofing insurance settlement in the Denver metro area.
In this guide you’ll find practical advice that reflects the unique weather challenges of Colorado – from hail‑heavy summers to winter freeze‑thaw cycles. Each tip is built around real‑world observations from Peak To Peak Roofing and aligns with national roofing standards and Colorado regulations. Use the list as a checklist before you call your insurer or schedule a repair.
The items are ordered to match the typical claim timeline, starting with documentation and ending with post‑repair verification. By following them you’ll reduce guesswork, avoid common pitfalls and increase the likelihood of a full, timely payout.
1. Capture Precise Damage Evidence
Imagine a hailstorm hits your roof in Aurora and you notice a few dented shingles, but the insurer asks for proof. The reality is that without clear, timestamped photos and a detailed inspection report, many claims stall at the first review. This is why a professional roof inspection from Peak To Peak Roofing is essential – it provides a documented baseline that insurers trust.
Schedule a free roof inspection within 48 hours of the event and ask the inspector to produce a written report with photos of each affected area. Pair the report with your own smartphone pictures taken from multiple angles, noting the date and time in the file name. When you submit these to the adjuster, you’ll have a solid evidence package that speeds up the claim.
2. Align Repairs with Local Building Codes
Colorado’s building codes, especially the International Residential Code adopted by Denver and Centennial, dictate specific flashing, underlayment and ventilation standards. Ignoring these requirements can lead to a denied claim or a reduced payout because the insurer may deem the work non‑compliant. The key is to match the repair plan with the code‑approved specifications before any work begins.
A common mistake is to replace damaged shingles with a lower‑grade product that doesn’t meet the local wind‑uplift rating of 110 mph required for the Front Range. When you upgrade to a Class 4 UL 2218 impact‑resistant shingle, you not only meet the code but also qualify for potential premium discounts.
Code‑Compliant Essentials
- Flashing: Use metal flashing that meets IRC R905, ensuring proper overlap and sealant to prevent water intrusion.
- Underlayment: Install a synthetic underlayment with a permeability of at least 150 perms to allow moisture escape while providing a secondary barrier.
- Ventilation: Provide a net free area of 1:150 (or 1:300 for high‑efficiency roofs) to avoid ice dams and extend shingle life.
- Wind Rating: Choose roofing products rated for at least 110 mph uplift, verified by ASTM D3161, to satisfy local wind load requirements.
- Fire Rating: Opt for Class A fire‑rated materials when possible, as many insurers give preference to higher fire classifications.
By confirming that every component of your repair meets or exceeds the local code, you protect your investment and give the insurer a clear reason to approve the full scope. This step also reduces the chance of future disputes during post‑repair inspections.
3. Leverage Impact‑Resistant Materials
In the Denver metro area, hail is the number one cause of roof claims, yet many homeowners still install standard 3‑tab shingles. The hidden cost is a higher deductible and longer repair timeline. Switching to impact‑resistant roofing, such as Class 4 UL 2218 shingles, can dramatically lower claim frequency and may qualify for insurer discounts.
The common pitfall is assuming any “premium” shingle will resist hail; only those tested to UL 2218 Class 4 meet the high‑impact standard. When you pair a Class 4 shingle with a reinforced underlayment, you create a system that often survives hailstones up to 2 inches in diameter without cracking.
Impact‑Resistant Options
- Class 4 Shingles: Offer the highest UL 2218 rating, reducing hail damage likelihood by up to 80 % in Hail Alley.
- Standing‑Seam Metal: Provides excellent impact resistance and wind uplift performance, often rated for 130 mph winds.
- TPO Membrane: White, reflective TPO can be reinforced with a polyester scrim for added hail protection on low‑slope roofs.
- Modified Bitumen: APP‑modified membranes have high tensile strength, helping them resist puncture from large hail.
- Cool‑Roof Coatings: Reflective coatings lower roof temperature, indirectly reducing thermal stress that can exacerbate hail damage.
Investing in impact‑resistant materials may raise upfront costs, but the payoff comes in fewer claim headaches and possible insurance premium reductions. It’s a practical way to future‑proof your roof against Colorado’s notorious hail storms.
4. Prepare a Detailed Xactimate Scope
Adjusters rely on line‑item estimates, and a poorly prepared Xactimate scope can trigger supplemental requests that delay payment. In Denver, where labor rates and material costs differ from the national average, it’s vital to tailor the estimate to local pricing and code upgrades.
A frequent error is omitting required code upgrades, such as additional underlayment for new energy‑code compliance. Including these items up front prevents the insurer from issuing a “non‑recoverable” notice later.
Scope Essentials
- Line‑Item Detail: List each component – shingles, underlayment, flashing, fasteners – with quantity, unit cost and total.
- Code Upgrade: Add a line for any required code‑compliant material, referencing the Denver Building & Fire Code.
- Manufacturer Specs: Cite the exact product model, for example, GAF Timberline HD shingles, to validate warranty coverage.
- Labor Rates: Use the local labor multiplier (approximately 1.2× the national average) for accurate cost projection.
- Contingency: Include a 5‑10 % contingency for unforeseen conditions such as hidden water damage.
A well‑structured Xactimate scope shows the insurer that you’ve accounted for every necessary element, reducing the back‑and‑forth that often stalls claims. It also gives you a transparent roadmap for the repair process.
5. Communicate Promptly with the Adjuster
After you submit your evidence and scope, many homeowners wait for the adjuster to call, only to discover missed deadlines. The reality is that insurers often set a 30‑day window for claim resolution, and any delay can lead to reduced recoverable depreciation.
Reach out within 48 hours of filing, confirm receipt of your documents, and ask for a timeline. Keep a log of every conversation, noting dates, names and next steps. This proactive approach keeps the process moving and demonstrates your commitment to a fair settlement.
6. Review the Final Settlement for Accuracy
When the insurer issues the final check, it’s tempting to accept it without a second look, especially after a stressful storm. However, many claims contain errors in material pricing or missed code upgrades, which can cost you thousands.
Compare the settlement line‑by‑line with your original Xactimate scope and the inspection report. If you spot discrepancies, such as a lower shingle grade or omitted ventilation, file a supplement within the statutory 30‑day window. Colorado’s SB 38 prohibits waiver of deductibles, so you’re protected when you contest inaccuracies.
7. Document Post‑Repair Maintenance
Even after a successful claim, neglecting routine roof care can lead to new damage and future claim complications. In the Denver area, seasonal temperature swings and UV exposure accelerate wear, making maintenance a critical part of long‑term protection.
A practical rule of thumb is to schedule a professional inspection after the first heavy snow melt and again before the summer hail season. Document each visit with photos and a brief report; this record can be invaluable if you ever need to file another claim.
Maintenance Checklist
- Seasonal Inspection: Check for loose shingles, flashing gaps and debris after each season.
- Gutter Clean‑out: Remove leaves and ice dams to prevent water infiltration that can void insurance coverage.
- Ventilation Check: Ensure soffit and ridge vents are clear to maintain proper attic airflow.
- Sealant Refresh: Re‑apply roof sealant around penetrations every 5‑7 years to maintain a watertight barrier.
Keeping a maintenance log demonstrates to insurers that you’re a responsible homeowner, which can lower future premiums and simplify any subsequent claims. It also protects the investment you made by following the earlier seven tips.
Securing Your Roof and Your Wallet
These seven steps turn a confusing roofing insurance process into a manageable, transparent experience for homeowners across Denver, Aurora, Littleton and Centennial. By documenting damage, meeting code requirements, choosing impact‑resistant materials and staying on top of communication, you set the stage for a fair settlement and a roof that lasts.
Ready to put these tips into action? Reach out to Peak To Peak Roofing for a professional inspection and let our specialists guide you through every claim detail. With our expertise, you’ll navigate the insurance maze confidently and protect your home for years to come.
Author
JJ Hedden is the owner of Peak To Peak Roofing and brings fifteen years of hands‑on experience handling roofing insurance claims in Colorado’s high‑hail zones. His practical insight helps homeowners understand code nuances and claim strategies, ensuring smoother payouts and longer‑lasting roofs.