
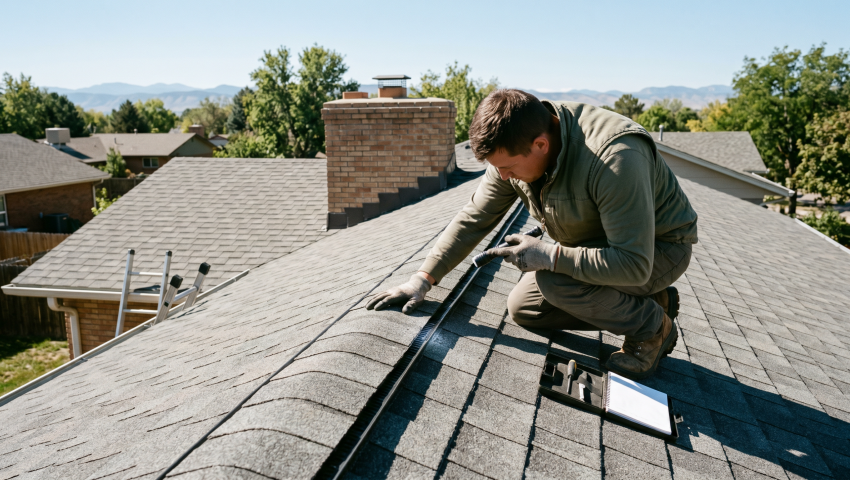
Most roof owners assume a visual glance after a new roof is enough, yet hidden fastener gaps often cause leaks later. Spotting these issues early saves money and protects warranties.
Many homeowners in Denver think a fresh roof means they can skip a detailed inspection, but the reality is that hidden fastener problems and improper flashing are the leading causes of early failures. The common belief that a contractor’s sign‑off guarantees perfection ignores the fact that even experienced crews can miss a misaligned ridge cap or a loose underlayment edge. Ignoring these subtle defects can lead to costly water intrusion during a hailstorm or a snow‑load event.
This guide flips the usual checklist on its head by focusing on the specific stressors of Colorado’s high‑altitude climate, hail, UV exposure, and rapid freeze‑thaw cycles. After reading, you’ll be able to spot the exact signs of a compromised roof, understand why each check matters, and feel confident that your warranty remains intact.
Step 1: Verify Fastener Placement and Nail Embedment
You’ve probably walked the roof after installation and assumed the nails look fine, yet most issues stem from fasteners that sit too shallow or are spaced irregularly. This step corrects that misconception by measuring embedment depth and confirming the required pattern for your shingle type. In practice, the pattern you’ll see most often is four nails per shingle at the edges and six in the field for high‑wind zones like Denver.
Watch for nails that bend under pressure, as they often indicate overtightening that can crack the shingle mat. Also, avoid the mistake of counting only visible nails, many are hidden under the starter course or under the ridge cap. A successful inspection shows every fastener fully penetrates the deck by at least three‑quarters of an inch and follows the manufacturer’s spacing chart.
Key Checks
- Fastener Depth: Use a ruler or depth gauge to confirm each nail or screw embeds at least 0.75 inches into the deck; shallow fasteners reduce wind uplift resistance.
- Spacing Pattern: Compare the observed nail layout against the roof‑system’s installation guide, such as GAF’s 4‑nail edge and 6‑nail field pattern for Class A shingles.
- Corrosion Check: Inspect fastener heads for signs of rust or coating loss; stainless‑steel or hot‑dip galvanized fasteners are required in Denver’s humid‑freeze cycles.
- Hidden Fasteners: Lift the starter course and ridge cap to verify fasteners beneath; missing or loose fasteners here are a frequent source of water leaks.
When fastener depth and spacing meet the specifications, the roof gains the wind uplift resistance required by ASCE 7‑16 and the wind class in ASTM D7158. This solid foundation prevents shingle blow‑off during a Chinook wind event. With the fasteners secured, you’re ready to move on to checking the critical flashing details.
Step 2: Inspect Flashing Details Around Penetrations
Most people think flashing is just a metal strip and that any installation will do, but in Denver’s hail‑prone zones, poorly sealed flashing is the number cause of water intrusion. This step focuses on the proper overlap, sealant application, and material compatibility for every roof‑wall junction. You’ll discover that a correctly installed step‑flashing can stop a leak that would otherwise seep through a cracked shingle.
Common pitfalls include missing the kick‑out flashing at roof‑to‑wall transitions and using the wrong gauge metal for a low‑slope TPO membrane. Ensure that each flashing piece is secured with the recommended number of fasteners and that the sealant remains intact after a freeze‑thaw cycle. A clean, watertight flash line means the roof can shed water efficiently even during a heavy snow melt.
Flashing Essentials
- Step‑Flashing Placement: Overlap the step‑flashing at least 2 inches over the base flash and seal the joint with a high‑quality roofing sealant rated for Class 4 hail impact.
- Kick‑Out Flashing: Install a metal kick‑out at every sidewall intersection to direct water away from the wall; verify it extends at least 6 inches beyond the roof edge.
- Material Match: Use aluminum flashing for metal roofs and galvanized steel for asphalt shingles, following the NRCA Roofing Manual recommendations.
- Sealant Integrity: Check that the sealant bead is continuous and free of cracks; replace any compromised sealant before the next rain.
Proper flashing ties the roof system together, meeting the waterproofing criteria set by the International Building Code Chapter 15. By confirming each flash is securely fastened and sealed, you protect the roof from hail punctures and ice‑dam formation. The next phase will evaluate the overall drainage and slope, which is vital for snow‑load management.
Step 3: Assess Drainage Slope and Ponding Risks
The slope of a roof may look flat to the eye, yet even a slight deviation can cause water to pool, especially after a heavy snow melt in Denver. This step involves measuring the pitch with a level and confirming that all drainage paths are clear of debris, ensuring water flows toward gutters and downspouts. You’ll also verify that the drip edge is correctly installed to guide water away from the fascia.
If the slope is insufficient, ponding water can accelerate membrane aging and lead to premature leaks. Look for signs of standing water after a rainstorm; a quick visual check can reveal low spots that need re‑leveling or additional slope. Once the drainage is verified, the roof will be ready for the final verification of material adhesion and warranty documentation.
Step 4: Document Findings and Secure Warranty Coverage
Many owners assume the contractor’s paperwork is enough for warranty claims, yet insurers often demand detailed, third‑party documentation. This step ensures you capture clear photos, written notes, and measurements that align with the manufacturer’s warranty requirements, such as GAF’s system‑level warranty or Owens Corning’s impact‑rated shingle warranty. Proper documentation also satisfies Denver’s building‑code inspection policies for post‑installation verification.
A frequent error is neglecting to record the exact location of any defect, which can lead to disputes during a claim. Use a grid system to label each photo and note the corresponding roof‑deck area, flashing type, and fastener count. When the report is complete, you’ll have a defensible record that protects your investment against hail, wind, and snow‑load events.
Key metrics to capture during a post‑installation roof inspection:
| Metric | Target Value | Tool Used | Typical Issue |
|---|---|---|---|
| Fastener Embedment | ≥0.75 in | Depth gauge | Shallow fasteners |
| Flashing Overlap | ≥2 in | Tape measure | Insufficient overlap |
| Slope (pitch) | ≥2 % (1:50) | Digital level | Ponding water |
| Sealant Continuity | No cracks | Visual inspection | Sealant cracking |
| Photo Grid Coverage | 100 % roof area | Drone or camera | Missing sections |
Documentation Checklist
- Photo Grid: Capture high‑resolution images of each roof section, labeling them with a grid reference (e.g., A1, B2) to match the inspection report.
- Measurement Log: Record fastener embedment depths, flashing overlaps, and slope angles using a digital level or laser measure; include units and tolerances.
- Defect Summary: List every issue found, describing the location, severity, and recommended corrective action; prioritize hail‑impact damage and sealant failures.
- Warranty Reference: Cite the specific warranty clause, such as GAF’s 10‑year material guarantee, and attach the manufacturer’s installation instructions for verification.
- Submission Package: Compile the report, photos, and measurement sheets into a single PDF and submit it to both the roofing contractor and your insurance adjuster.
With a thorough, well‑organized report, you meet the documentation standards set by the International Residential Code Chapter 9 and the Denver Building and Fire Code. This step locks in warranty protection and provides a clear baseline for future maintenance. The final table below summarizes the key inspection metrics you should record on every post‑installation roof inspection.
Ensuring Long‑Term Roof Performance
You’ve now walked through a systematic post‑installation roof inspection that addresses fastener integrity, flashing waterproofing, drainage slope, and documentation for warranty protection. By applying these steps, you reduce the risk of leaks during Denver’s hail season and ensure compliance with local building codes. The result is a roof that stands up to wind uplift, snow load, and UV exposure, keeping your home safe and your warranty valid.
Next, schedule regular seasonal checks, especially after a major storm, and keep the inspection report handy for any future insurance claim or resale. If you need professional assistance, consider reaching out to our roof installation services or explore our roofing insurance claim specialists for peace of mind.
Author
JJ Hedden is the owner of Peak To Peak Roofing, bringing 15 years of hands‑on experience to Colorado’s demanding roof market. He has overseen thousands of installations across Denver, Aurora, and surrounding communities, giving him a practical perspective on post‑installation inspections. His deep familiarity with local code nuances and weather challenges makes his guidance especially reliable.