
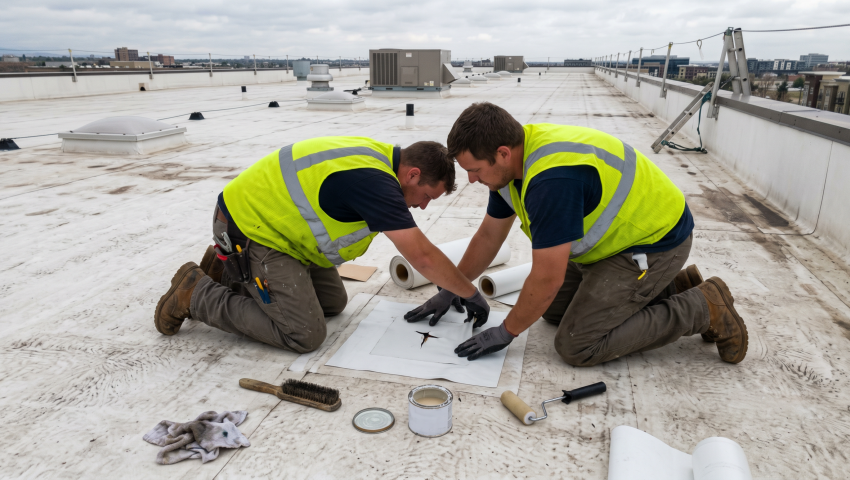
Most crews seal punctures with a quick patch, but without proper surface prep the repair fails within weeks. Following a disciplined process keeps the roof watertight and protects your warranty.
Many property managers assume a simple patch will stop a leak, yet Denver’s hail and UV exposure quickly break down weak bonds. The reality is that a rushed repair often leads to water intrusion and costly re‑work. Ignoring the need for thorough preparation is the biggest mistake you’ll see on commercial roofs.
This guide flips that mindset by treating each puncture as a mini‑system that must meet the same standards as the original roof. You’ll learn how to verify membrane compatibility, apply the right overlap, and document the work for code compliance across Denver, Aurora, Littleton and beyond.
Step 1: Secure a Safe Work Zone
Before any material touches the membrane, set up fall protection and clear the area of debris; OSHA requires guardrails or a personal fall arrest system for work over six feet. In practice, a loose tarp can become a slip hazard when wind picks up, so anchor it with weighted sandbags. This step also lets you assess the puncture without risking injury or contaminating the surface.
If you skip the safety setup, you risk a fall and may miss hidden damage that only appears when the roof is dry. Confirm that all crew members are equipped with harnesses and that the site is clear of loose objects before moving on. Once the zone is secured, you can proceed to the next phase with confidence.
Step 2: Document the Damage and Gather Materials
Take photos of the puncture, note its size, and record the membrane type, TPO, EPDM, PVC or modified bitumen, because each requires a specific repair kit. A quick visual inspection often reveals multiple nearby punctures that would be missed without a systematic survey. Use a moisture meter to confirm the area is dry; Denver’s freeze‑thaw cycles can hide hidden moisture.
Missing any of these details can lead to an incompatible patch that fails under UV exposure, which averages a UV index of 9 in summer. Compile a checklist that includes a primer, compatible patch material, sealant and a silicone roller. When the list is complete, you’re ready to start the surface preparation.
Step 3: Prepare the Surface for Adhesion
A common myth is that a quick sweep is enough before applying a patch, but Denver’s dusty environment means contaminants can prevent a proper bond. The real issue is that oil, loose granules and rust from fasteners create micro‑gaps that let water seep under the repair. Proper preparation eliminates the most common cause of early patch failure.
Watch for stubborn stains and old sealant that won’t peel off with a brush; a solvent wipe may be required. Successful preparation looks like a clean, dry surface with no visible debris, and a moisture content below 5 % as measured by a Tramex meter. When the surface meets these criteria, the adhesive will achieve the peel strength specified by ASTM D1876.
Key Prep Tasks
- Clean: Remove loose debris with a stiff‑bristled brush, then wipe the area with a solvent‑free rag to eliminate oil and dust.
- Dry: Ensure the membrane is completely dry; use a portable heater in cold weather to raise the temperature above 40 °F before applying adhesives.
- Abrade: Lightly sand the puncture edges with a 120‑grit pad to create a rough profile for better mechanical key.
- Prime: Apply a compatible primer according to the manufacturer’s instructions, allowing the recommended cure time before patch placement.
With a spotless, primed surface the patch will bond securely, resisting the high UV index and thermal cycling typical of Denver. This step also satisfies the NRCA’s recommendation for a minimum 3‑inch overlap beyond the damaged area. The roof is now ready for the membrane patch installation.
Step 4: Install the Membrane Patch Correctly
Many technicians think a larger patch automatically means a stronger repair, yet oversized patches can trap air and create bubbles that compromise watertightness. The real problem is uneven pressure during application, which can lead to edge lifting under wind uplift. Using a silicone roller and proper overlap ensures a uniform bond that meets FM Global uplift ratings.
Common pitfalls include applying the patch on a cold membrane, which reduces adhesive flow, and neglecting to round the patch corners, which creates stress points. A successful installation shows a smooth, seamless seam with no visible gaps, and the patch should pass a water‑spray test without leaking.
Patch Installation Tips
- Cut: Trim the patch to a shape that exceeds the puncture by at least 3 inches on all sides, rounding the corners to reduce stress.
- Apply Adhesive: Spread a uniform layer of the approved bonding adhesive, maintaining the manufacturer’s coverage rate of 0.5 oz per square foot.
- Place Patch: Position the patch carefully, press out any trapped air, then roll firmly with a silicone roller to achieve full contact.
- Seal Edges: Finish with a compatible sealant, overlapping the patch edge by 1 inch and smoothing with a putty knife for a watertight finish.
The patch now forms a monolithic bond that can endure Denver’s hail storms and UV exposure without delamination. This step also respects the International Building Code requirements for roof covering repairs. With the patch in place, you can move on to verification.
Step 5: Verify Watertightness and Document the Repair
A frequent mistake is to assume a visual inspection is enough; water can still infiltrate through micro‑cracks that only show up under pressure. The reality is that a controlled flood test or infrared thermography will reveal hidden leaks before the roof is re‑covered. Verification protects your warranty and ensures compliance with Denver’s building code.
Look for any temperature anomalies on an IR scan that exceed 2 °C, which indicate moisture behind the membrane. Successful verification shows a uniform temperature profile and no water egress during a 15‑minute flood test.
Verification Methods
- IR Scan: Use an infrared camera to detect temperature differentials that signal hidden moisture after the repair.
- Flood Test: Apply a gentle water flow over the patched area for 15 minutes, checking for any seepage on the interior side.
- Sealant Check: Inspect the sealant perimeter for uniform thickness and no gaps before the adhesive cures fully.
- Documentation: Photograph the finished repair, note the patch dimensions, and record the materials used for future reference.
By confirming a dry, uniform surface you reduce the risk of future leaks and meet the NRCA’s performance metrics for adhesion strength. This documented proof also satisfies insurance and code officials during the next inspection. The roof is now ready for final cleanup.
Step 6: Clean Up and Schedule Ongoing Maintenance
Many owners think the job ends when the patch cures, but neglecting cleanup can leave debris that accelerates UV degradation. The real issue is that leftover sealant residue can attract moisture, leading to new punctures. A thorough cleanup and a maintenance plan keep the roof performing for its intended service life.
Watch for stray adhesive on nearby equipment and remove it promptly; also verify that all safety gear is stored properly to avoid trip hazards. A successful wrap‑up includes a final walk‑through with the client, reviewing the repair and outlining a maintenance schedule.
Final Tasks
- Debris Removal: Sweep the work area, collect all cuttings and dispose of them according to EPA green‑infrastructure guidelines.
- Inspect Fasteners: Tighten any loose mechanical fasteners and replace corroded ones to maintain edge metal integrity.
- Apply Protective Coating: If the roof is a cool‑roof system, apply a thin reflective coating to match the original solar reflectance.
- Schedule Inspection: Set a follow‑up inspection in six months to verify the repair’s performance and address any early signs of wear.
With the site clean and a maintenance plan in place, the commercial roof is ready to weather Denver’s hail, UV and freeze‑thaw cycles without further puncture concerns. This final step also aligns with the International Code Council’s guidance on ongoing roof upkeep. You now have a complete, code‑compliant repair process.
Putting the Repair Process Into Action
You’ve moved from a risky quick‑patch mindset to a disciplined, code‑compliant workflow that addresses surface prep, proper patching, verification and long‑term maintenance. Each step builds on the previous one, ensuring the repaired area can withstand Denver’s harsh climate and meet the NRCA’s performance standards. The result is a watertight roof that protects your building’s interior and preserves warranty coverage.
Next, keep an eye on high‑traffic zones and schedule regular inspections, especially after hail events common in the Front Range. If you notice any new punctures, repeat this process or call a professional to avoid costly water damage. For peace of mind, consider a comprehensive roof inspection from our team to catch issues before they become emergencies.
Author
JJ Hedden is the owner of Peak To Peak Roofing, bringing 15 years of commercial roof repair experience across Denver and surrounding communities. He has overseen thousands of puncture repairs, ensuring they meet ASTM and IBC standards while staying cost‑effective. His practical approach helps building managers avoid common pitfalls and keep roofs performing for decades.